A Step-by-Step Guide For Creating Corporate Email Address for Your WordPress Website

Do you need to create a professional business email address for free? If the answer is yes, then you are in the right place.
A professional email is an essential part of your business when you're trying to win new clients. A business email uses your company name (or your brand name) instead of a generic Gmail, Yahoo, or Outlook account. In this way, your emails and contact information look much better than regular emails. It empowers your branding or company.
 In this article, we will show you how to create a business email address and use it through Gmail for free. The result will be something similar to this: [email protected] instead of [email protected]. We will show you how to hook it up to your Gmail account so that you can both send and receive emails through this new professional email address but have the comfort and familiarity of the Gmail platform.
What is a Business email address, and why is it necessary?
As mentioned above, a professional business email address shows your brand name instead of standard email accounts. In the first stage, many people use free email addresses without a domain name. As a result, it may look unprofessional and become harder for customers to trust and rely on the services.
So, with that said, let's get started.
Setup your Business address (Domain name)
To get a professional email like [email protected], you need to have a domain name. If you don't already have a website, we have a dedicated article regarding creating a website step by step.
Once you have purchased a domain name, you need to choose the best suitable hosting plan for you. But no worries, we have particular articles about free and paid premium plans, so you can check them and decide which one is the best for your needs. Once you have chosen a hosting plan, you can add your custom email account.
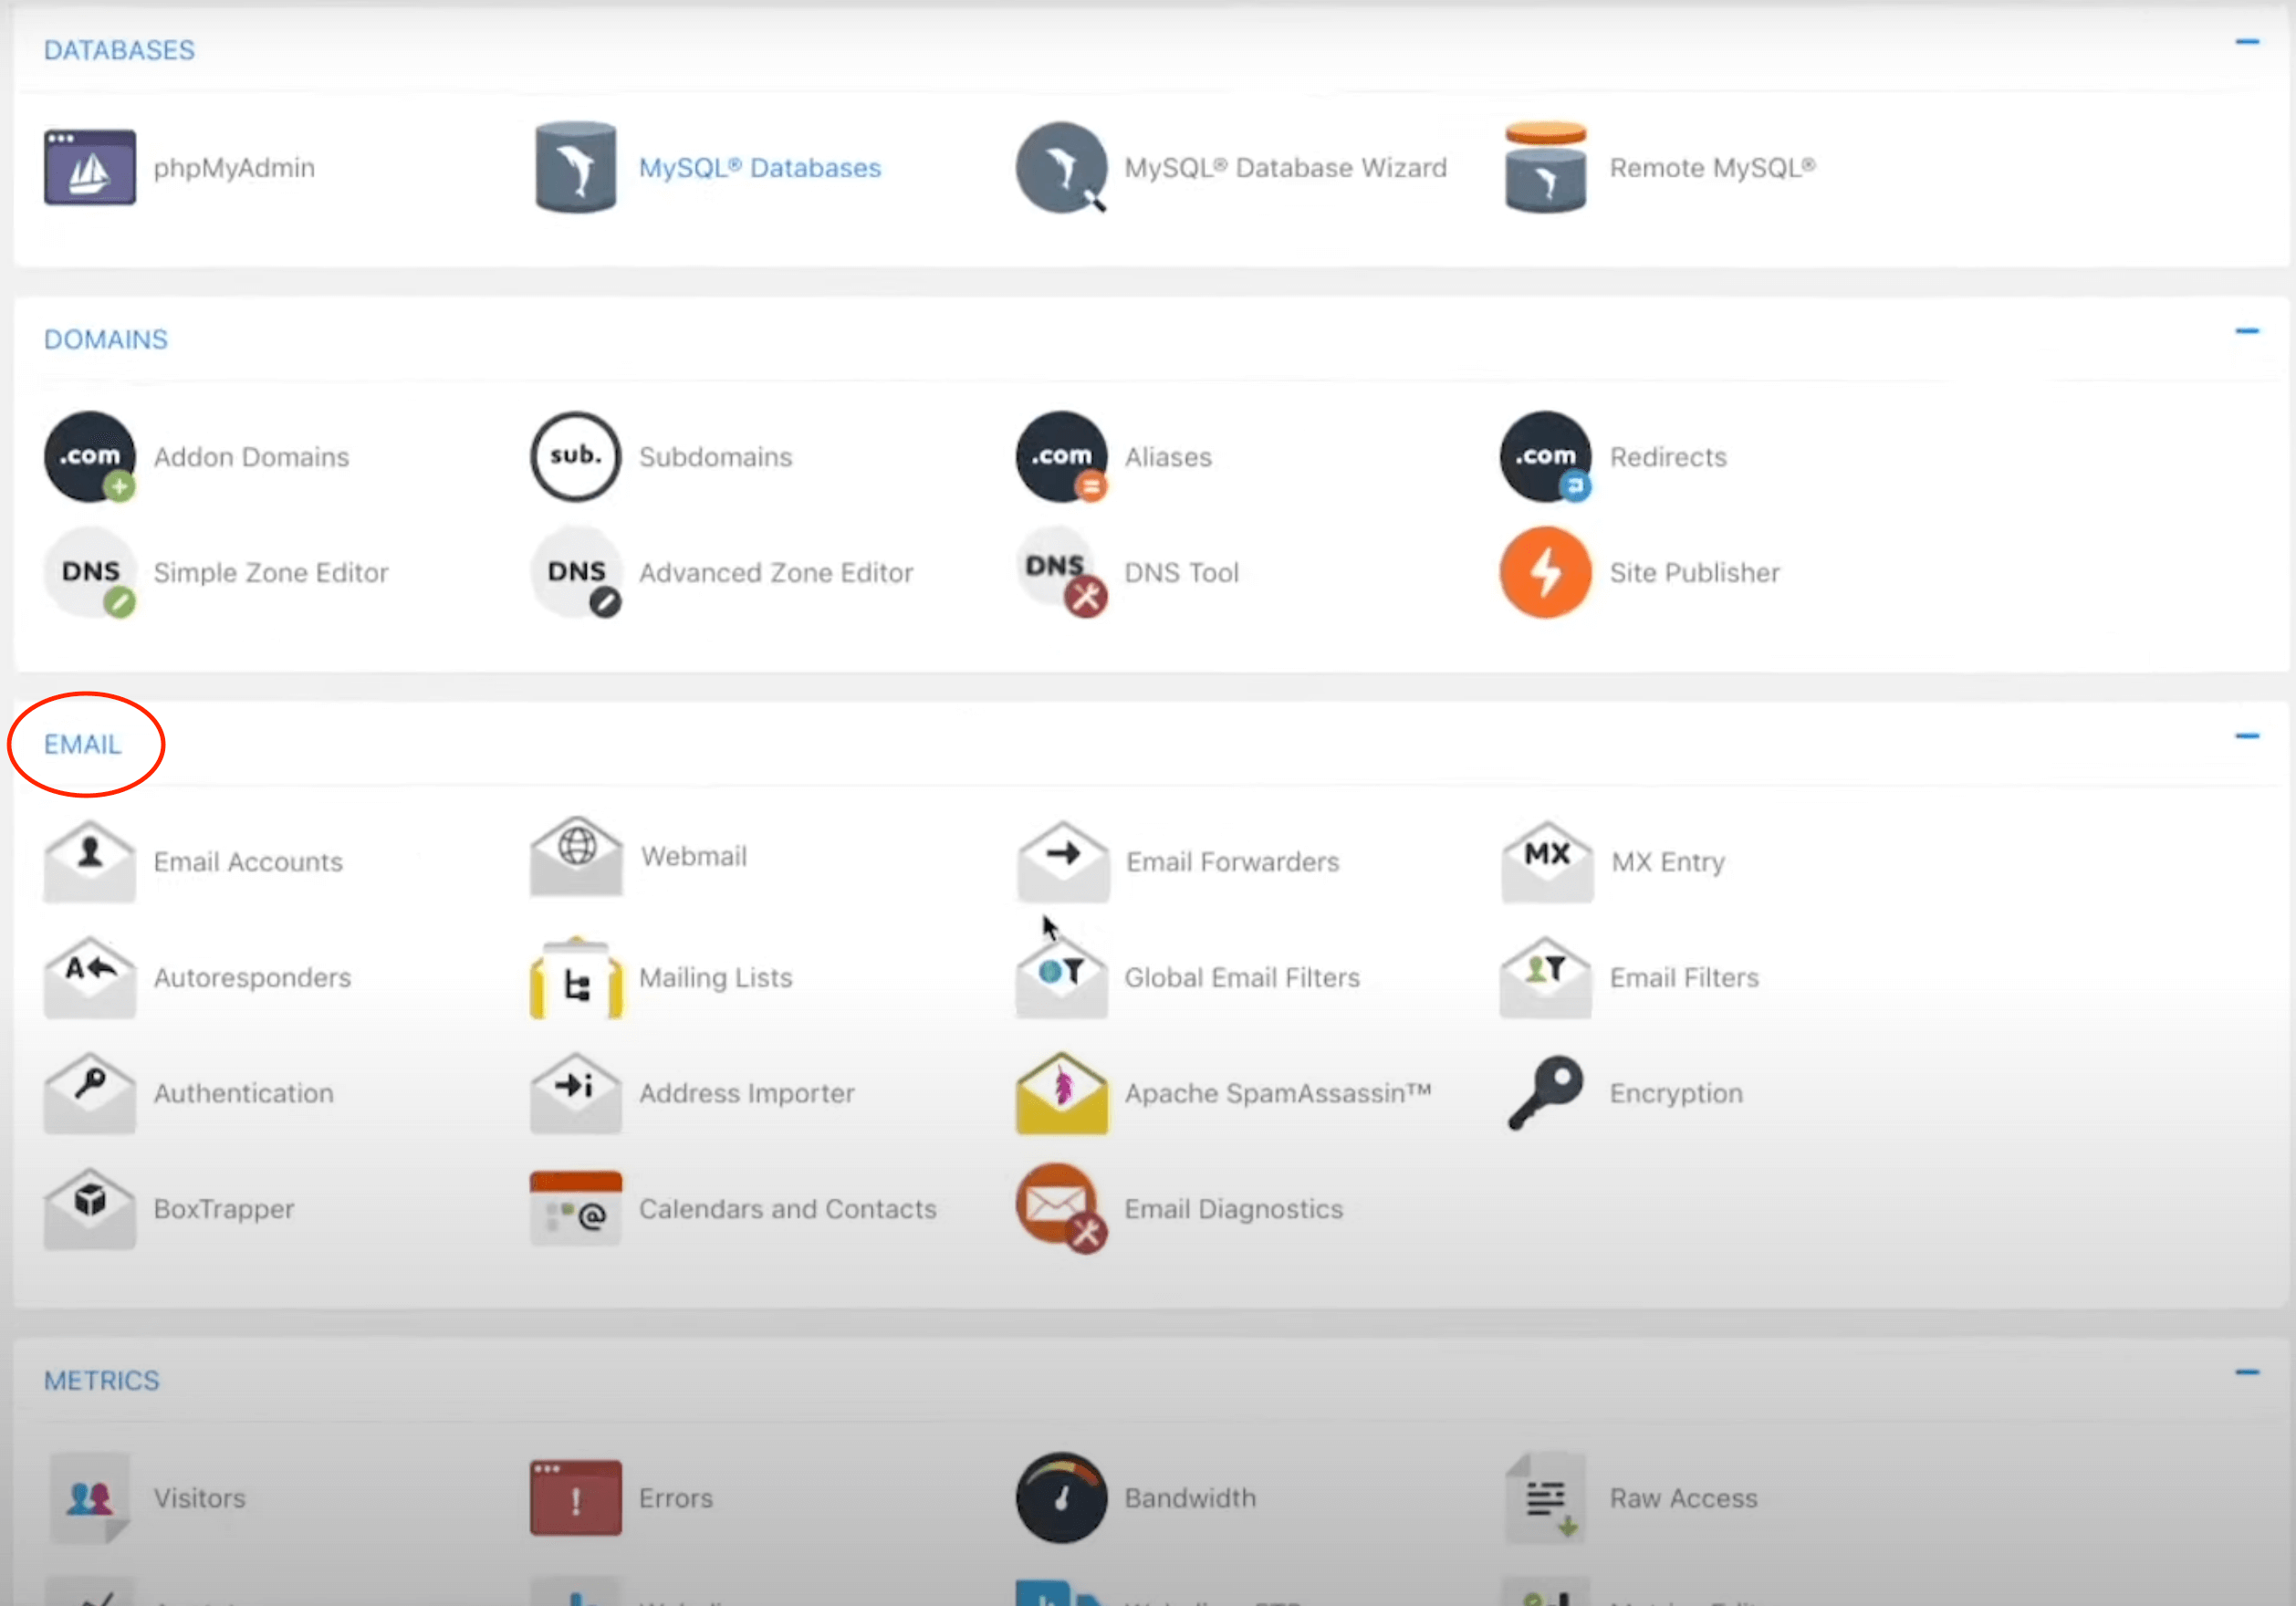
Simply go to your host provider's website and sign in. Then choose your hosting settings (in some hosting providers, it is called cPanel) and find the email section. This is the section where you will create your custom email address. Make sure that you click the unlimited box option. It will allow you to store as many emails as possible from various platforms without any issues.
Setting up an Email client
We have created our custom email address, and we can move to the next step, which is setting up your email client.
Mail client means that we will link up this new professional email address to your Gmail account so that way you can send and receive emails through your Gmail account but under your new custom professional name. To do this, we have to go over to Gmail and sign in.
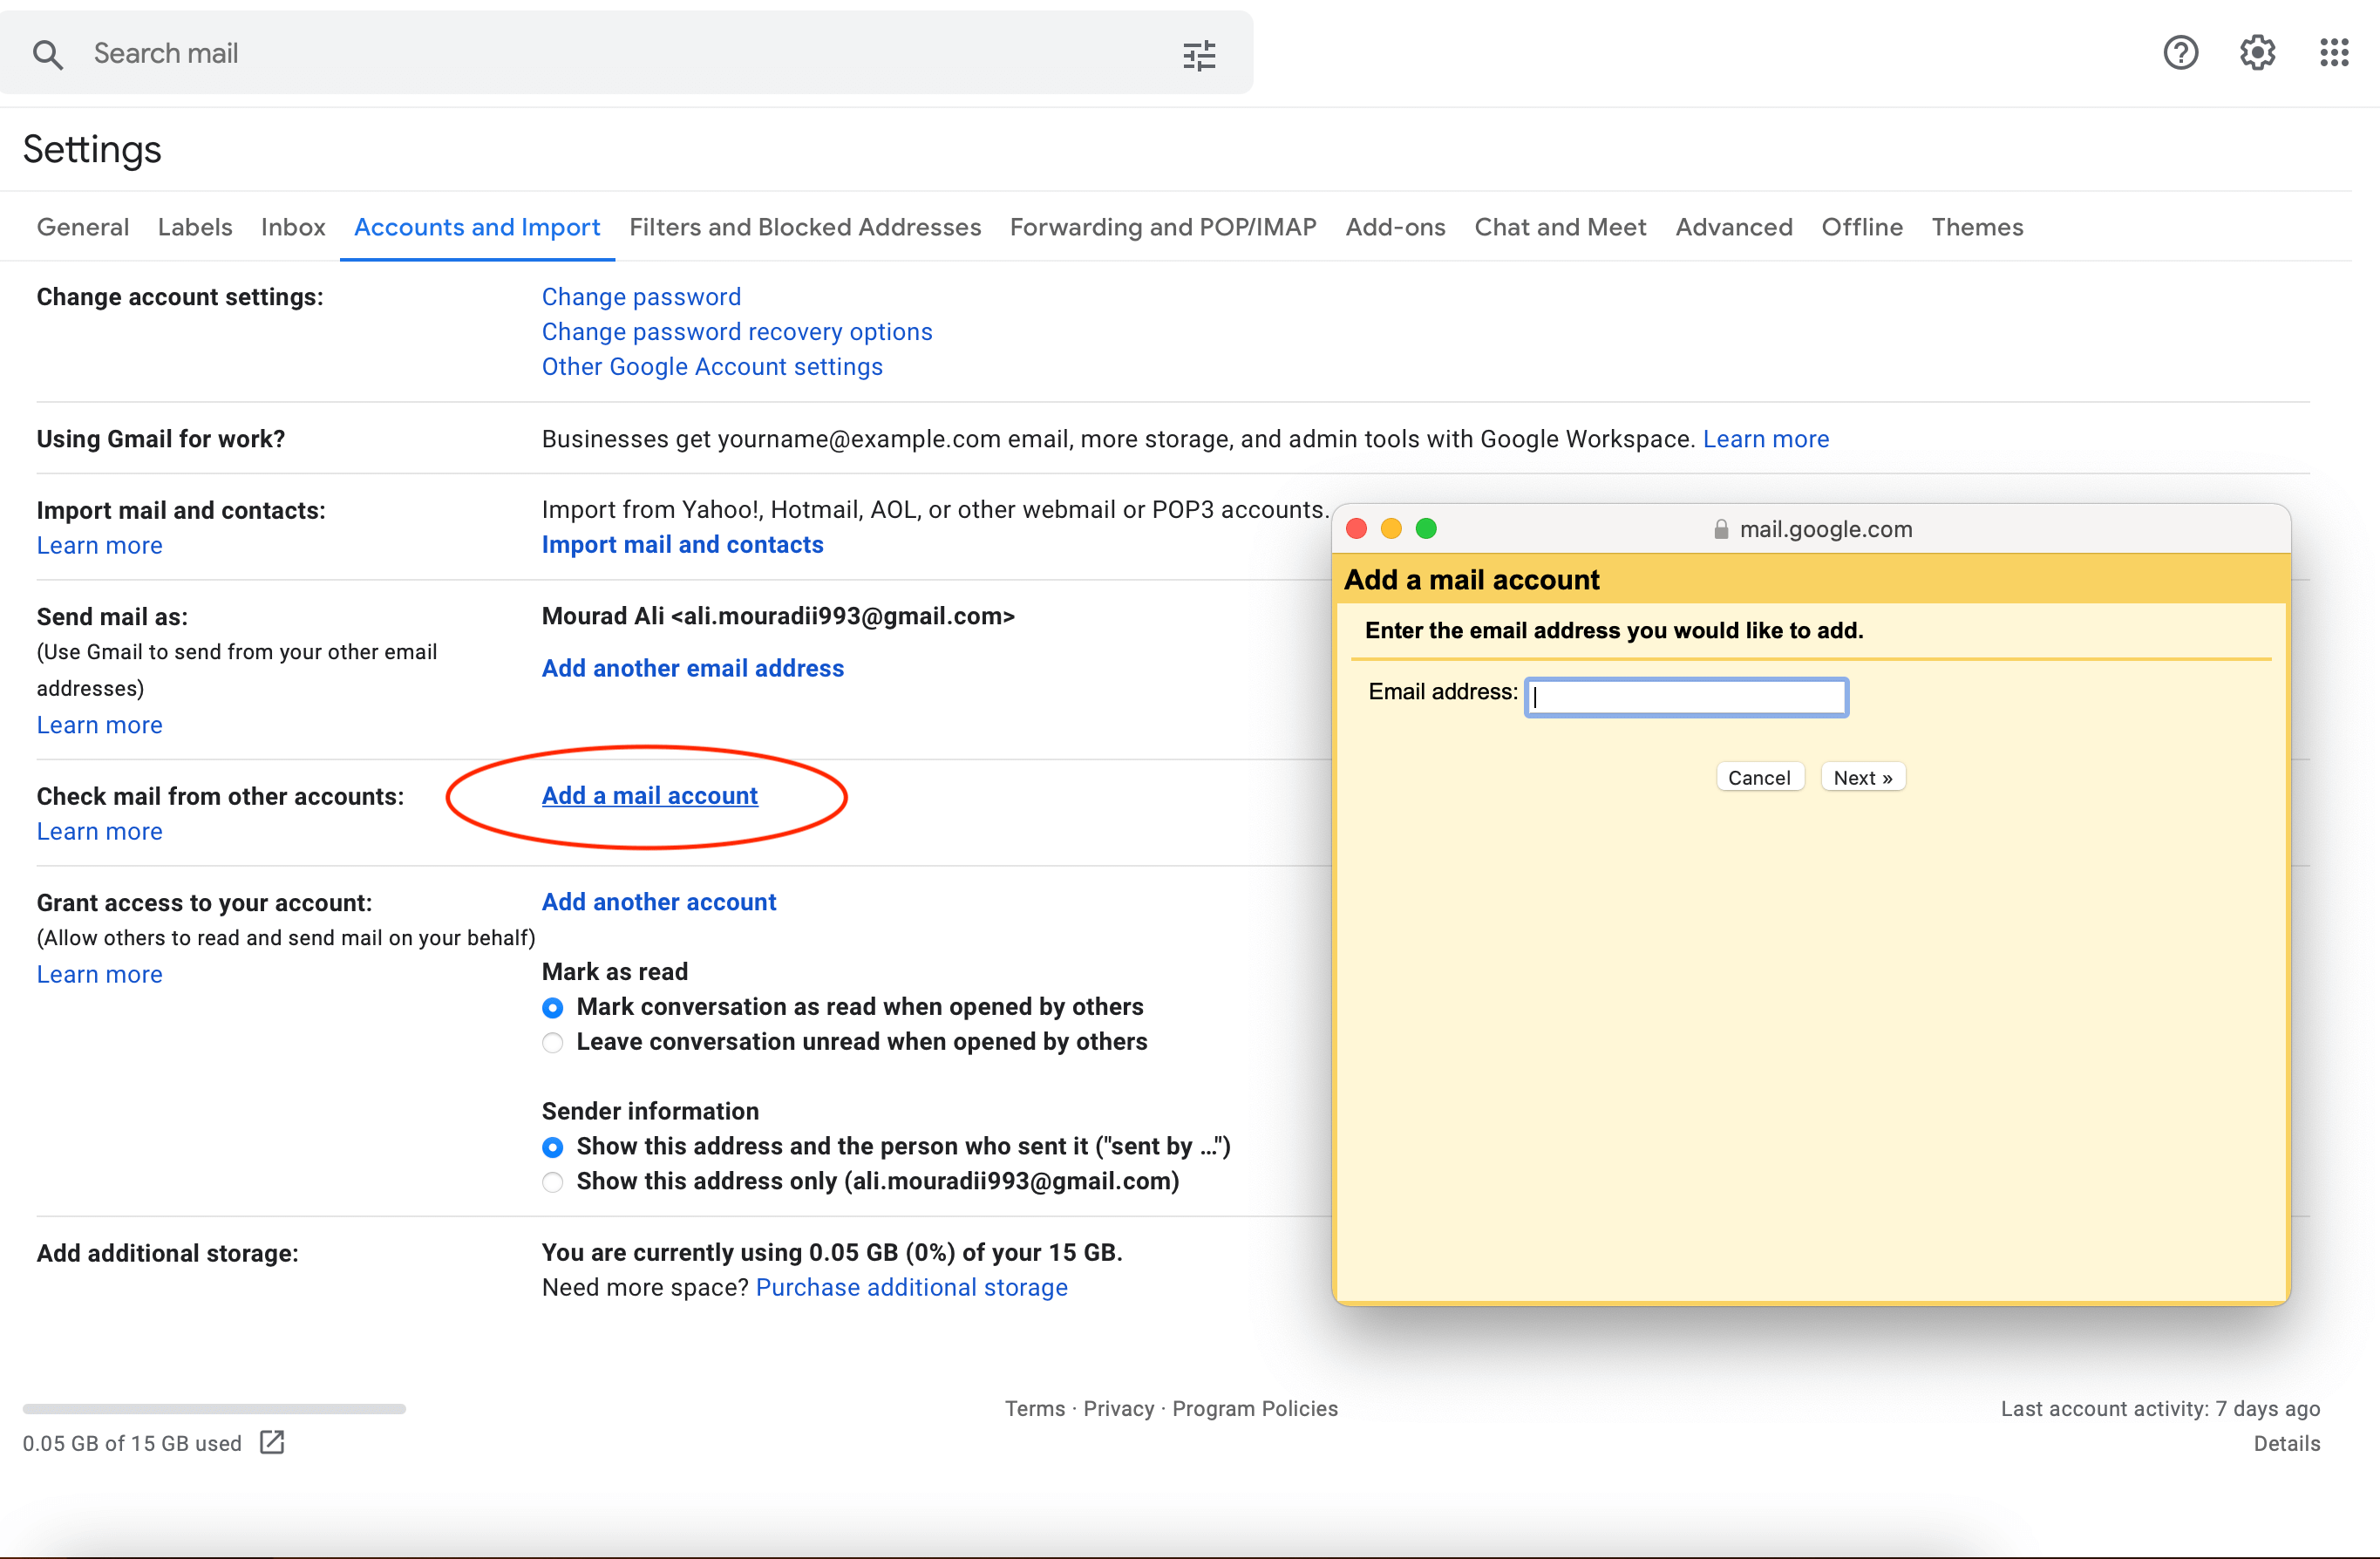
After signing in, go to the mail settings to see all available options. Then go on over to the accounts and import tab right here, and then if we scroll down, you'll see "check mail from other accounts." This is the place which we are going to add a mail account. When you click the option, a little yellow window will be opened, and you have to add the business email you created before. Enter your email details and hit next.
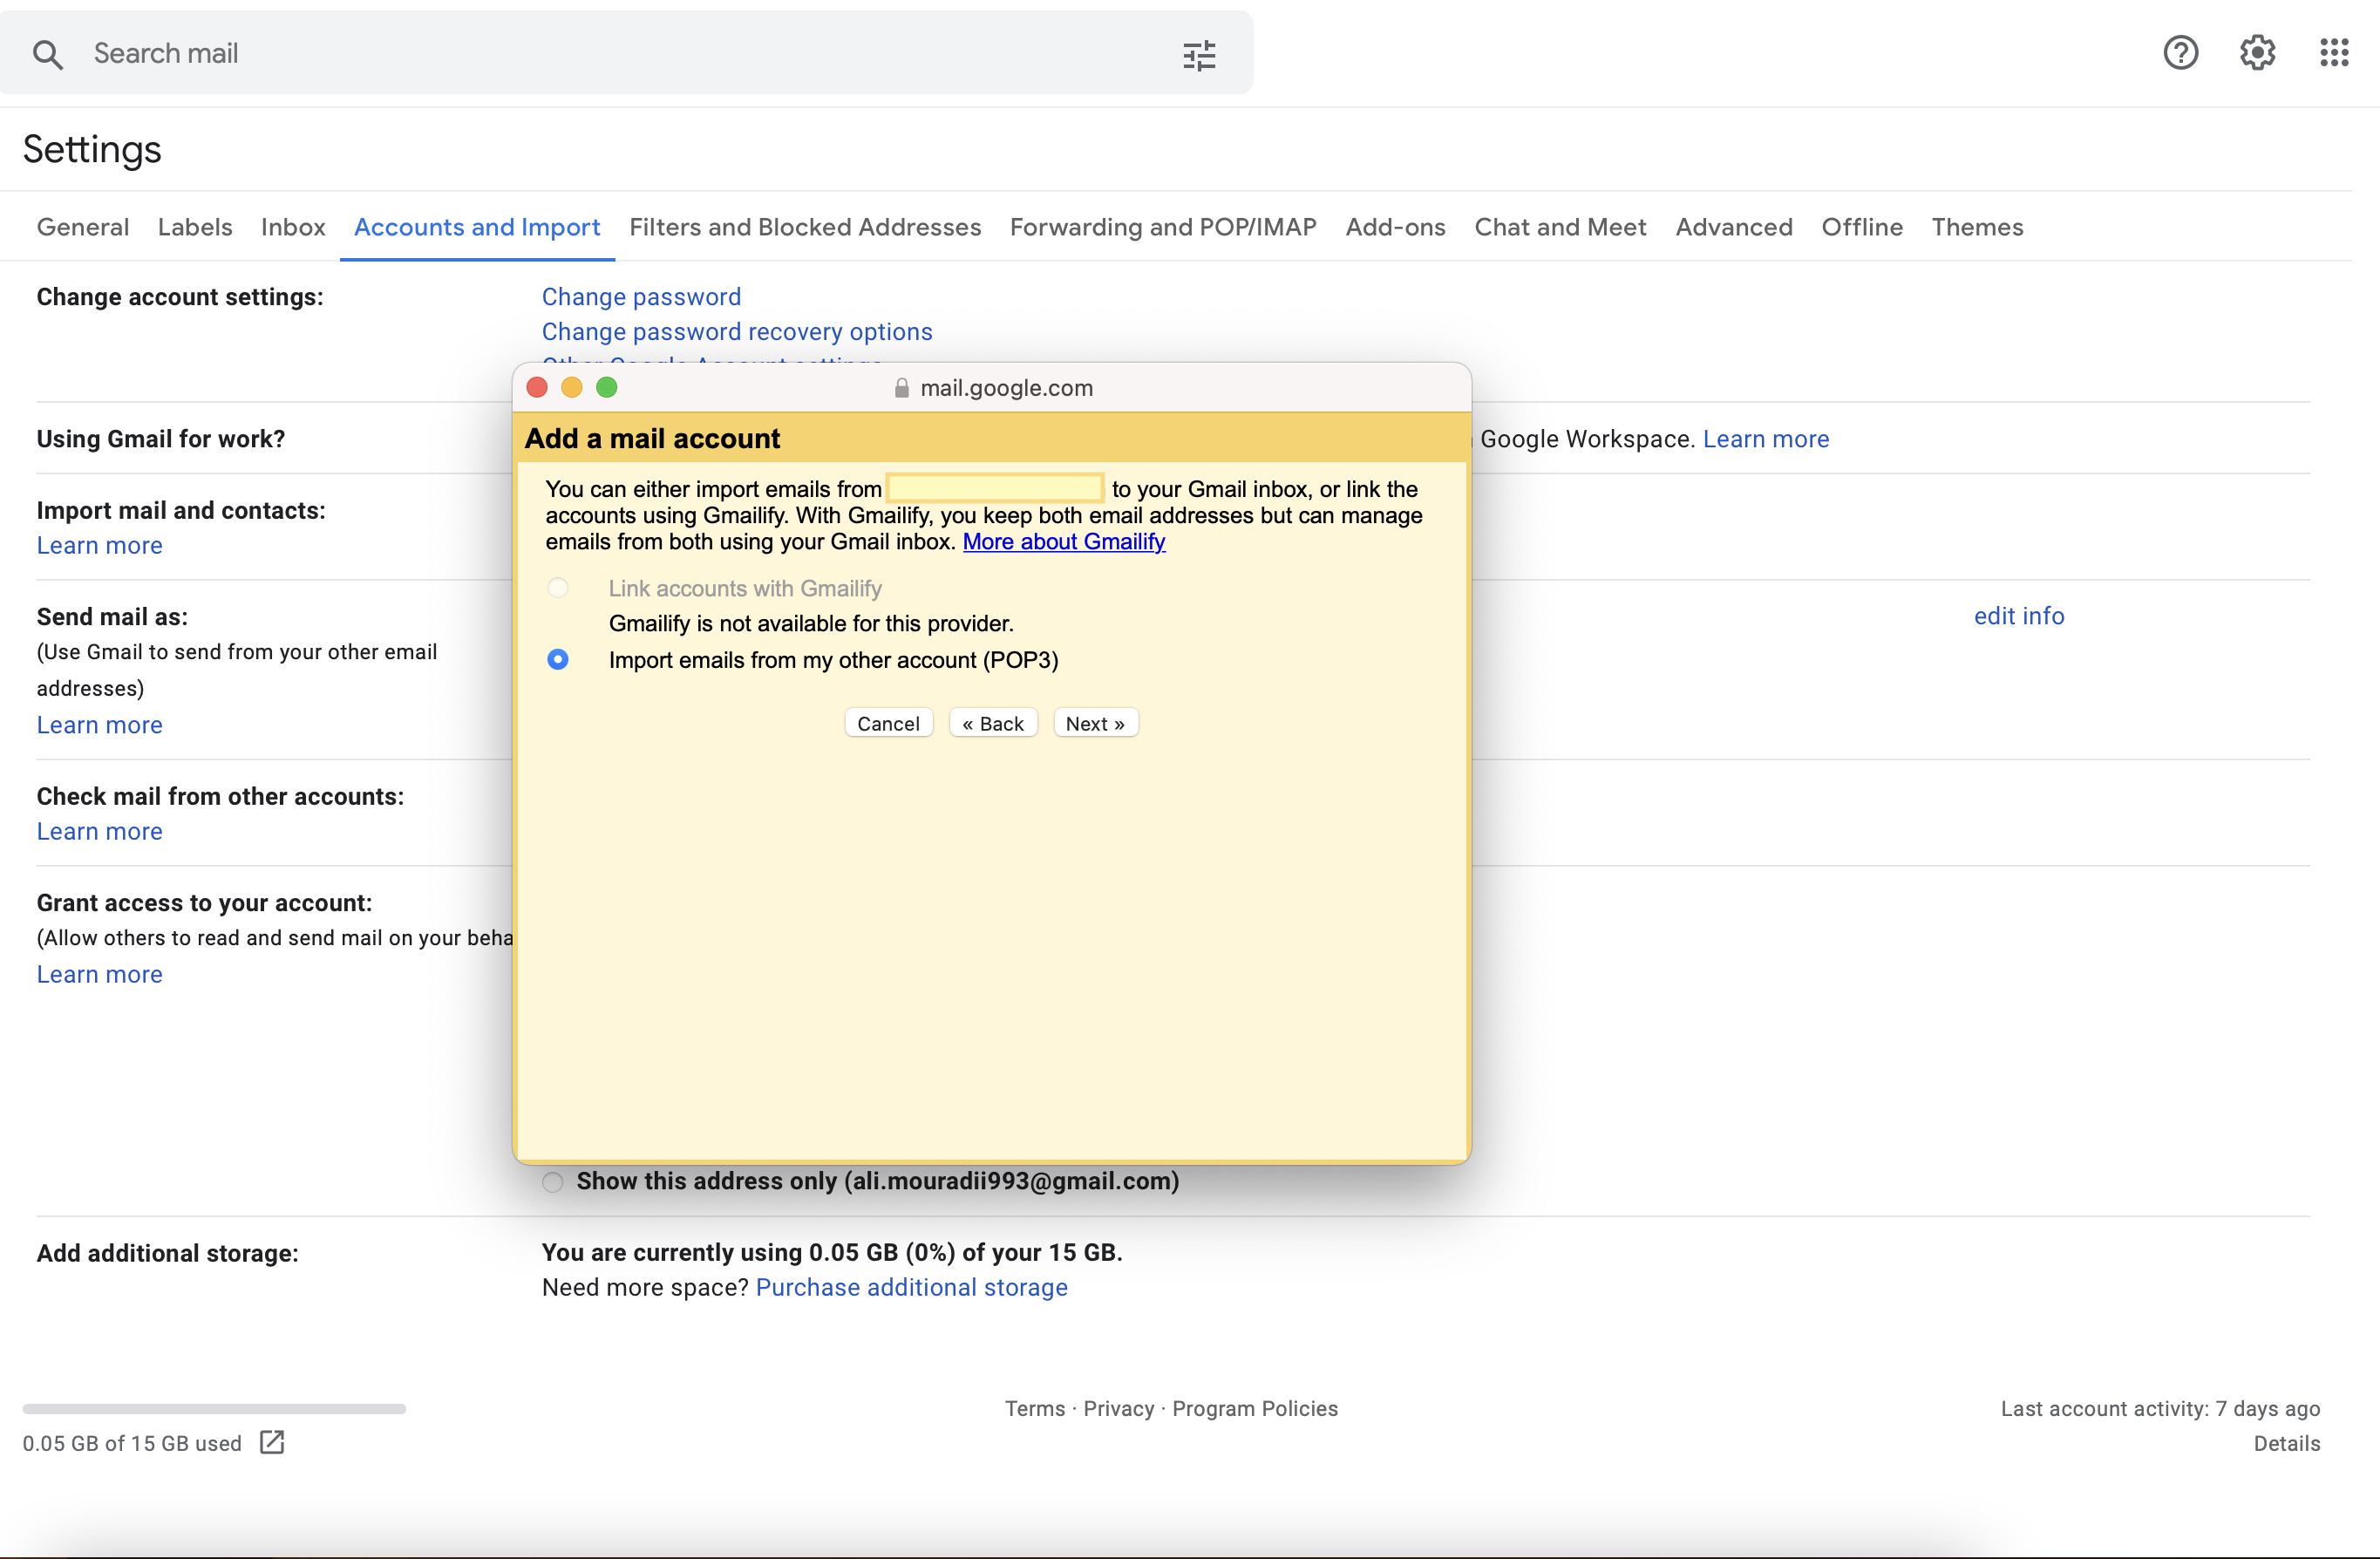
 Now you need to choose one of the options that the yellow window offers.
All you need is to choose the third option (because Gmailify does not work anymore) and import your emails from another account.
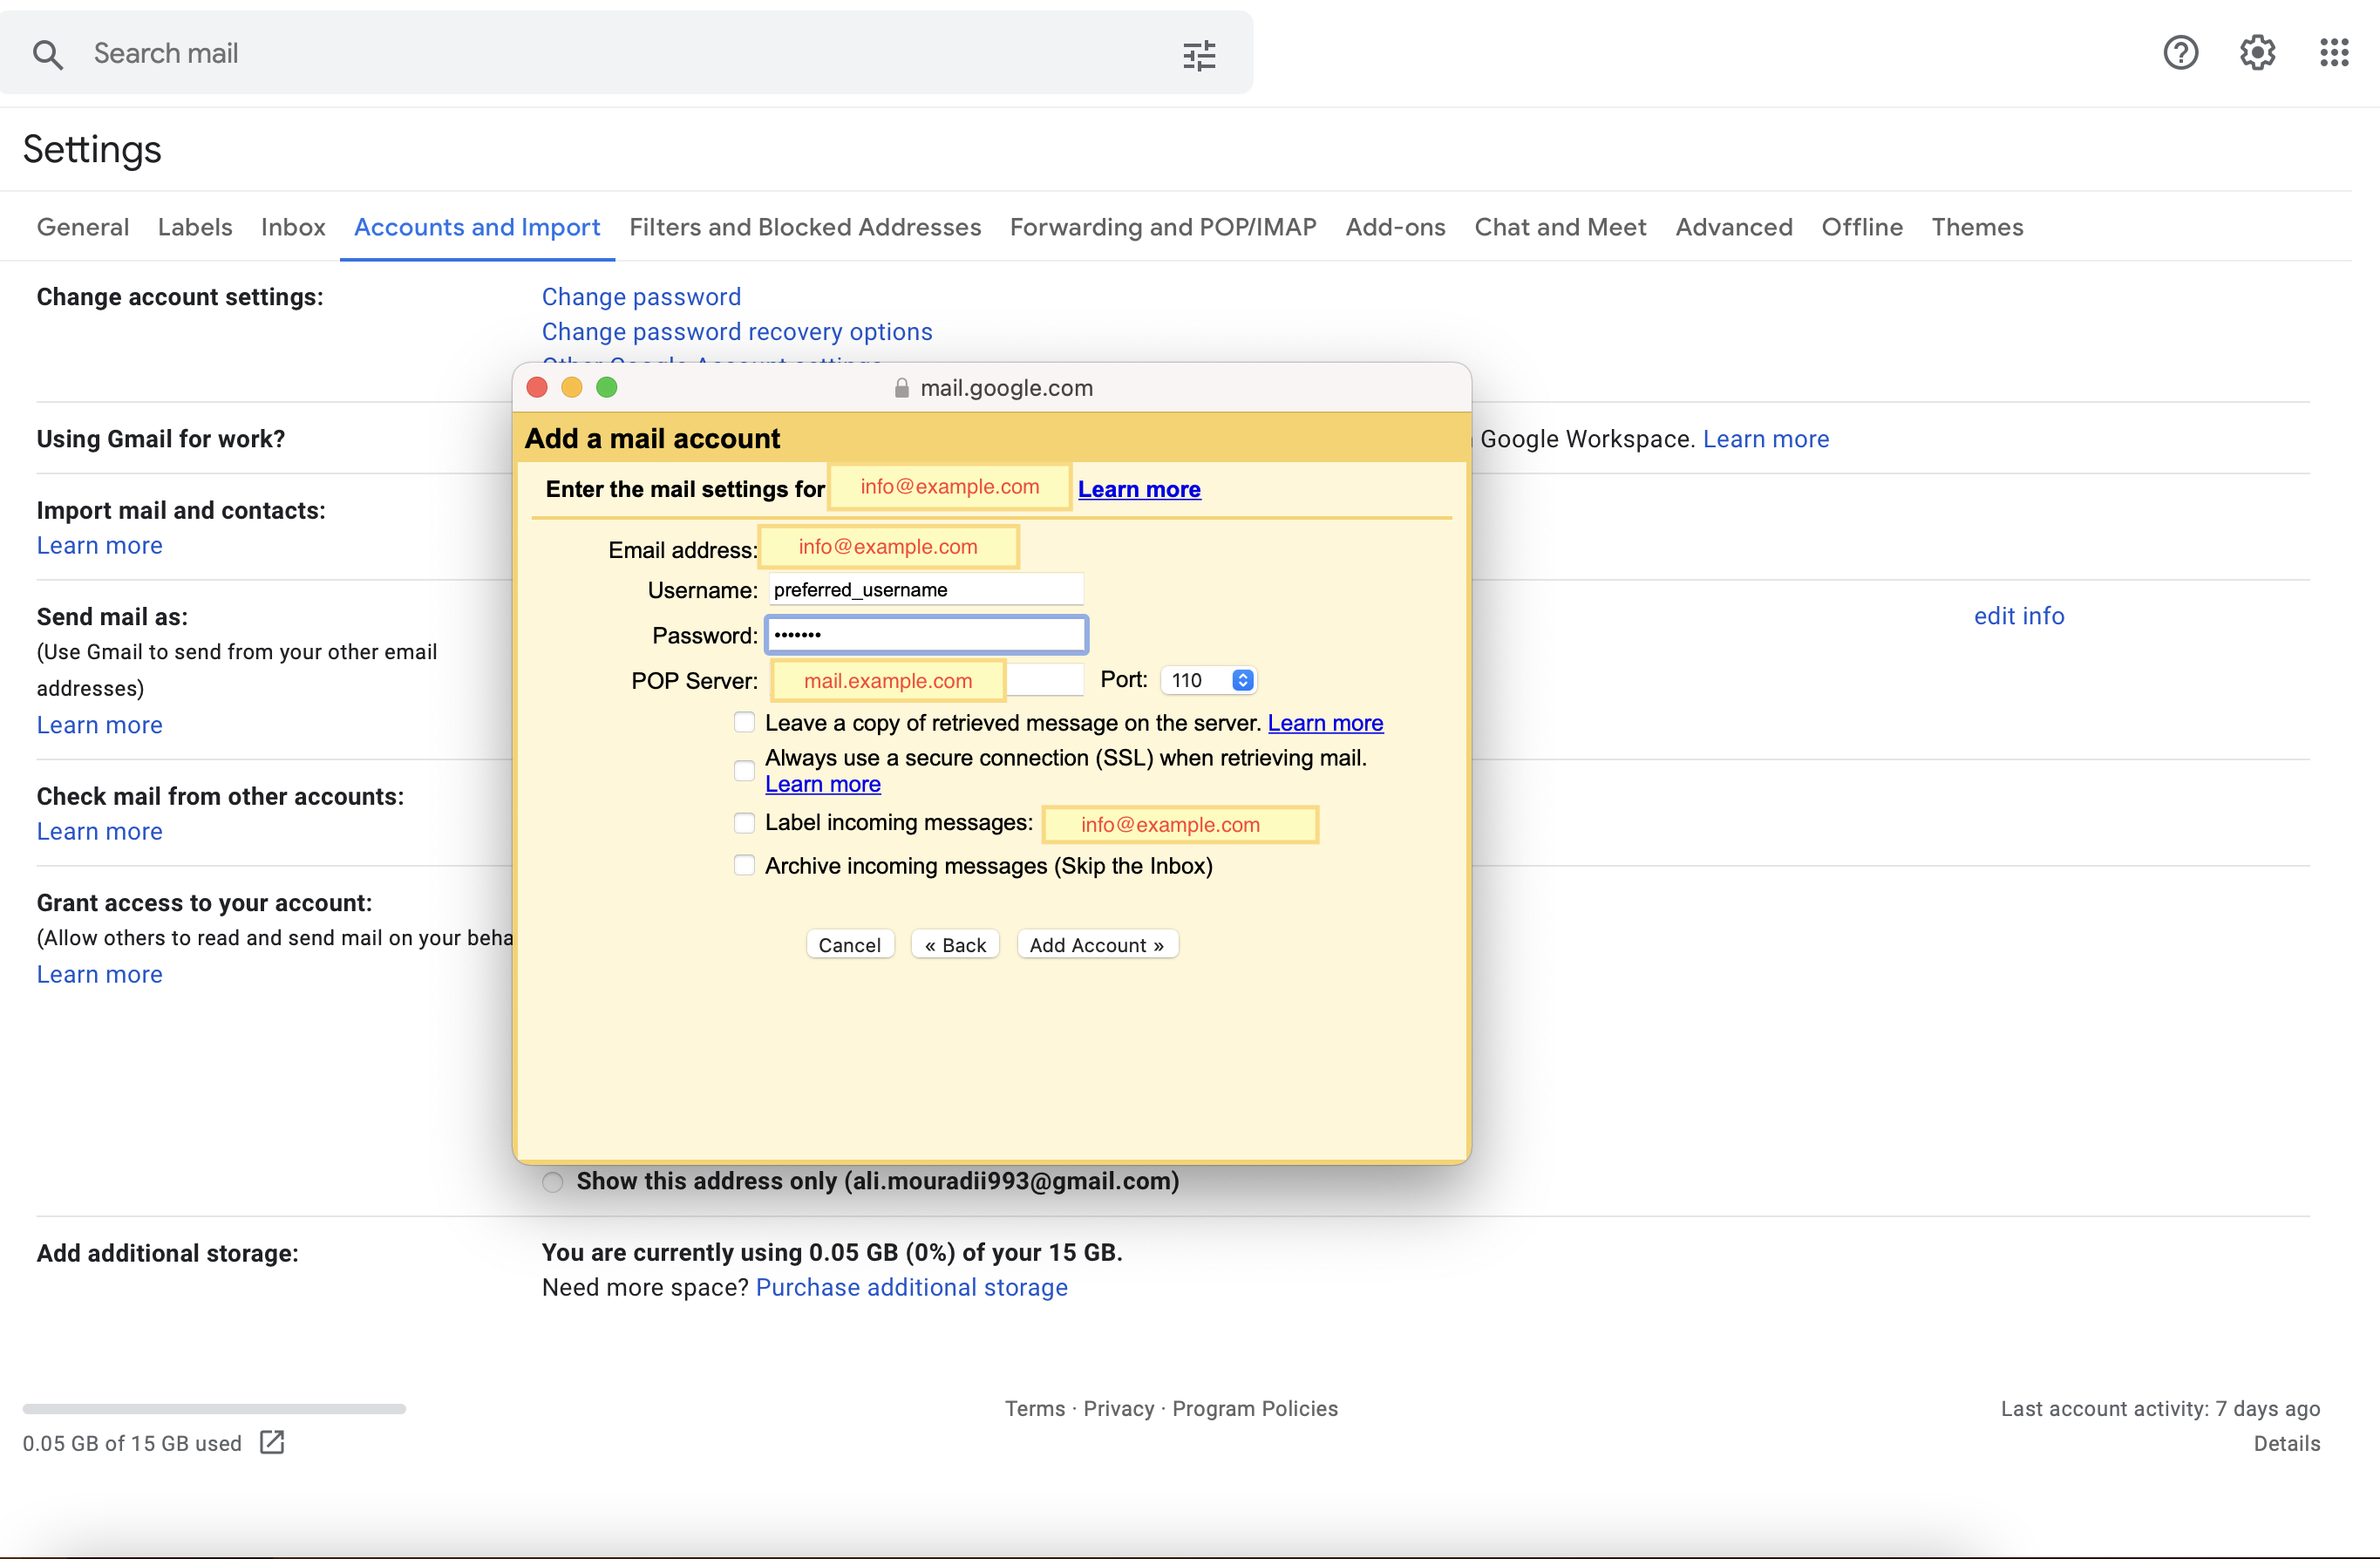
 Click next, then from here, you have to create a username and password. We recommend you choose the same username and password as you chose during the initial setup.
Ensure that the POP server option says mail.yourwebsite.com and label incoming messages that show your custom email account. Then click on add account and choose the first option to add your account to send mail as your desired email address.
Create alias
If you are done settings as mentioned earlier, you will be asked to create an alias. An alias means that you can add your actual name to this new professional email address whenever it shows up in somebody's inbox. It will not only show your professional email address but also show a personal touch of your first and last name.
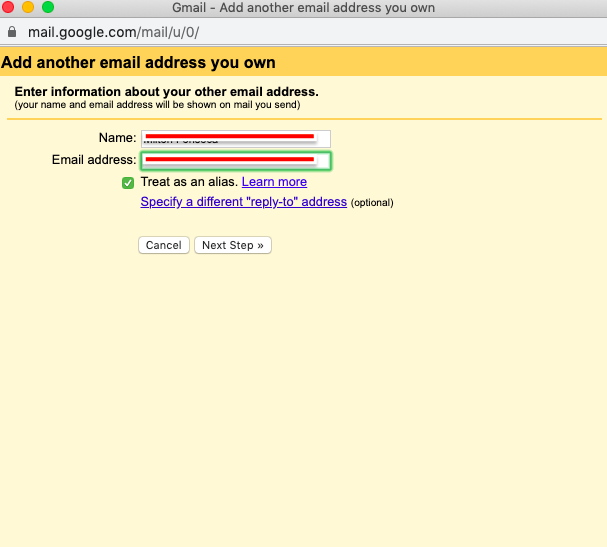
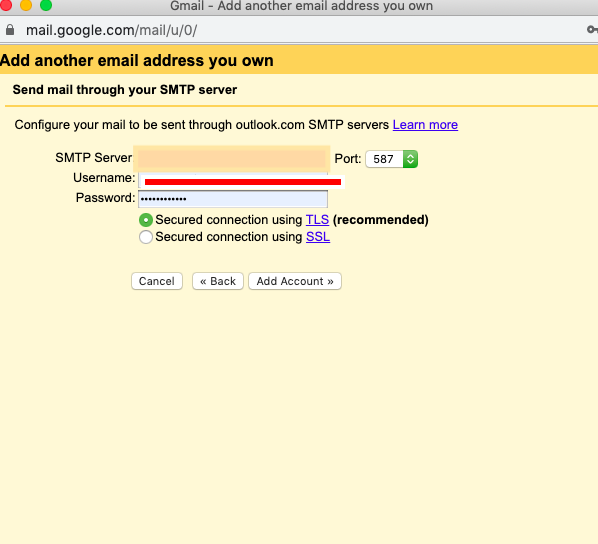
Go ahead and set up your desired alias. Then click on next create the same username and password that you just did before. Make sure that you're using a secured connection using TLS, and click on add account.
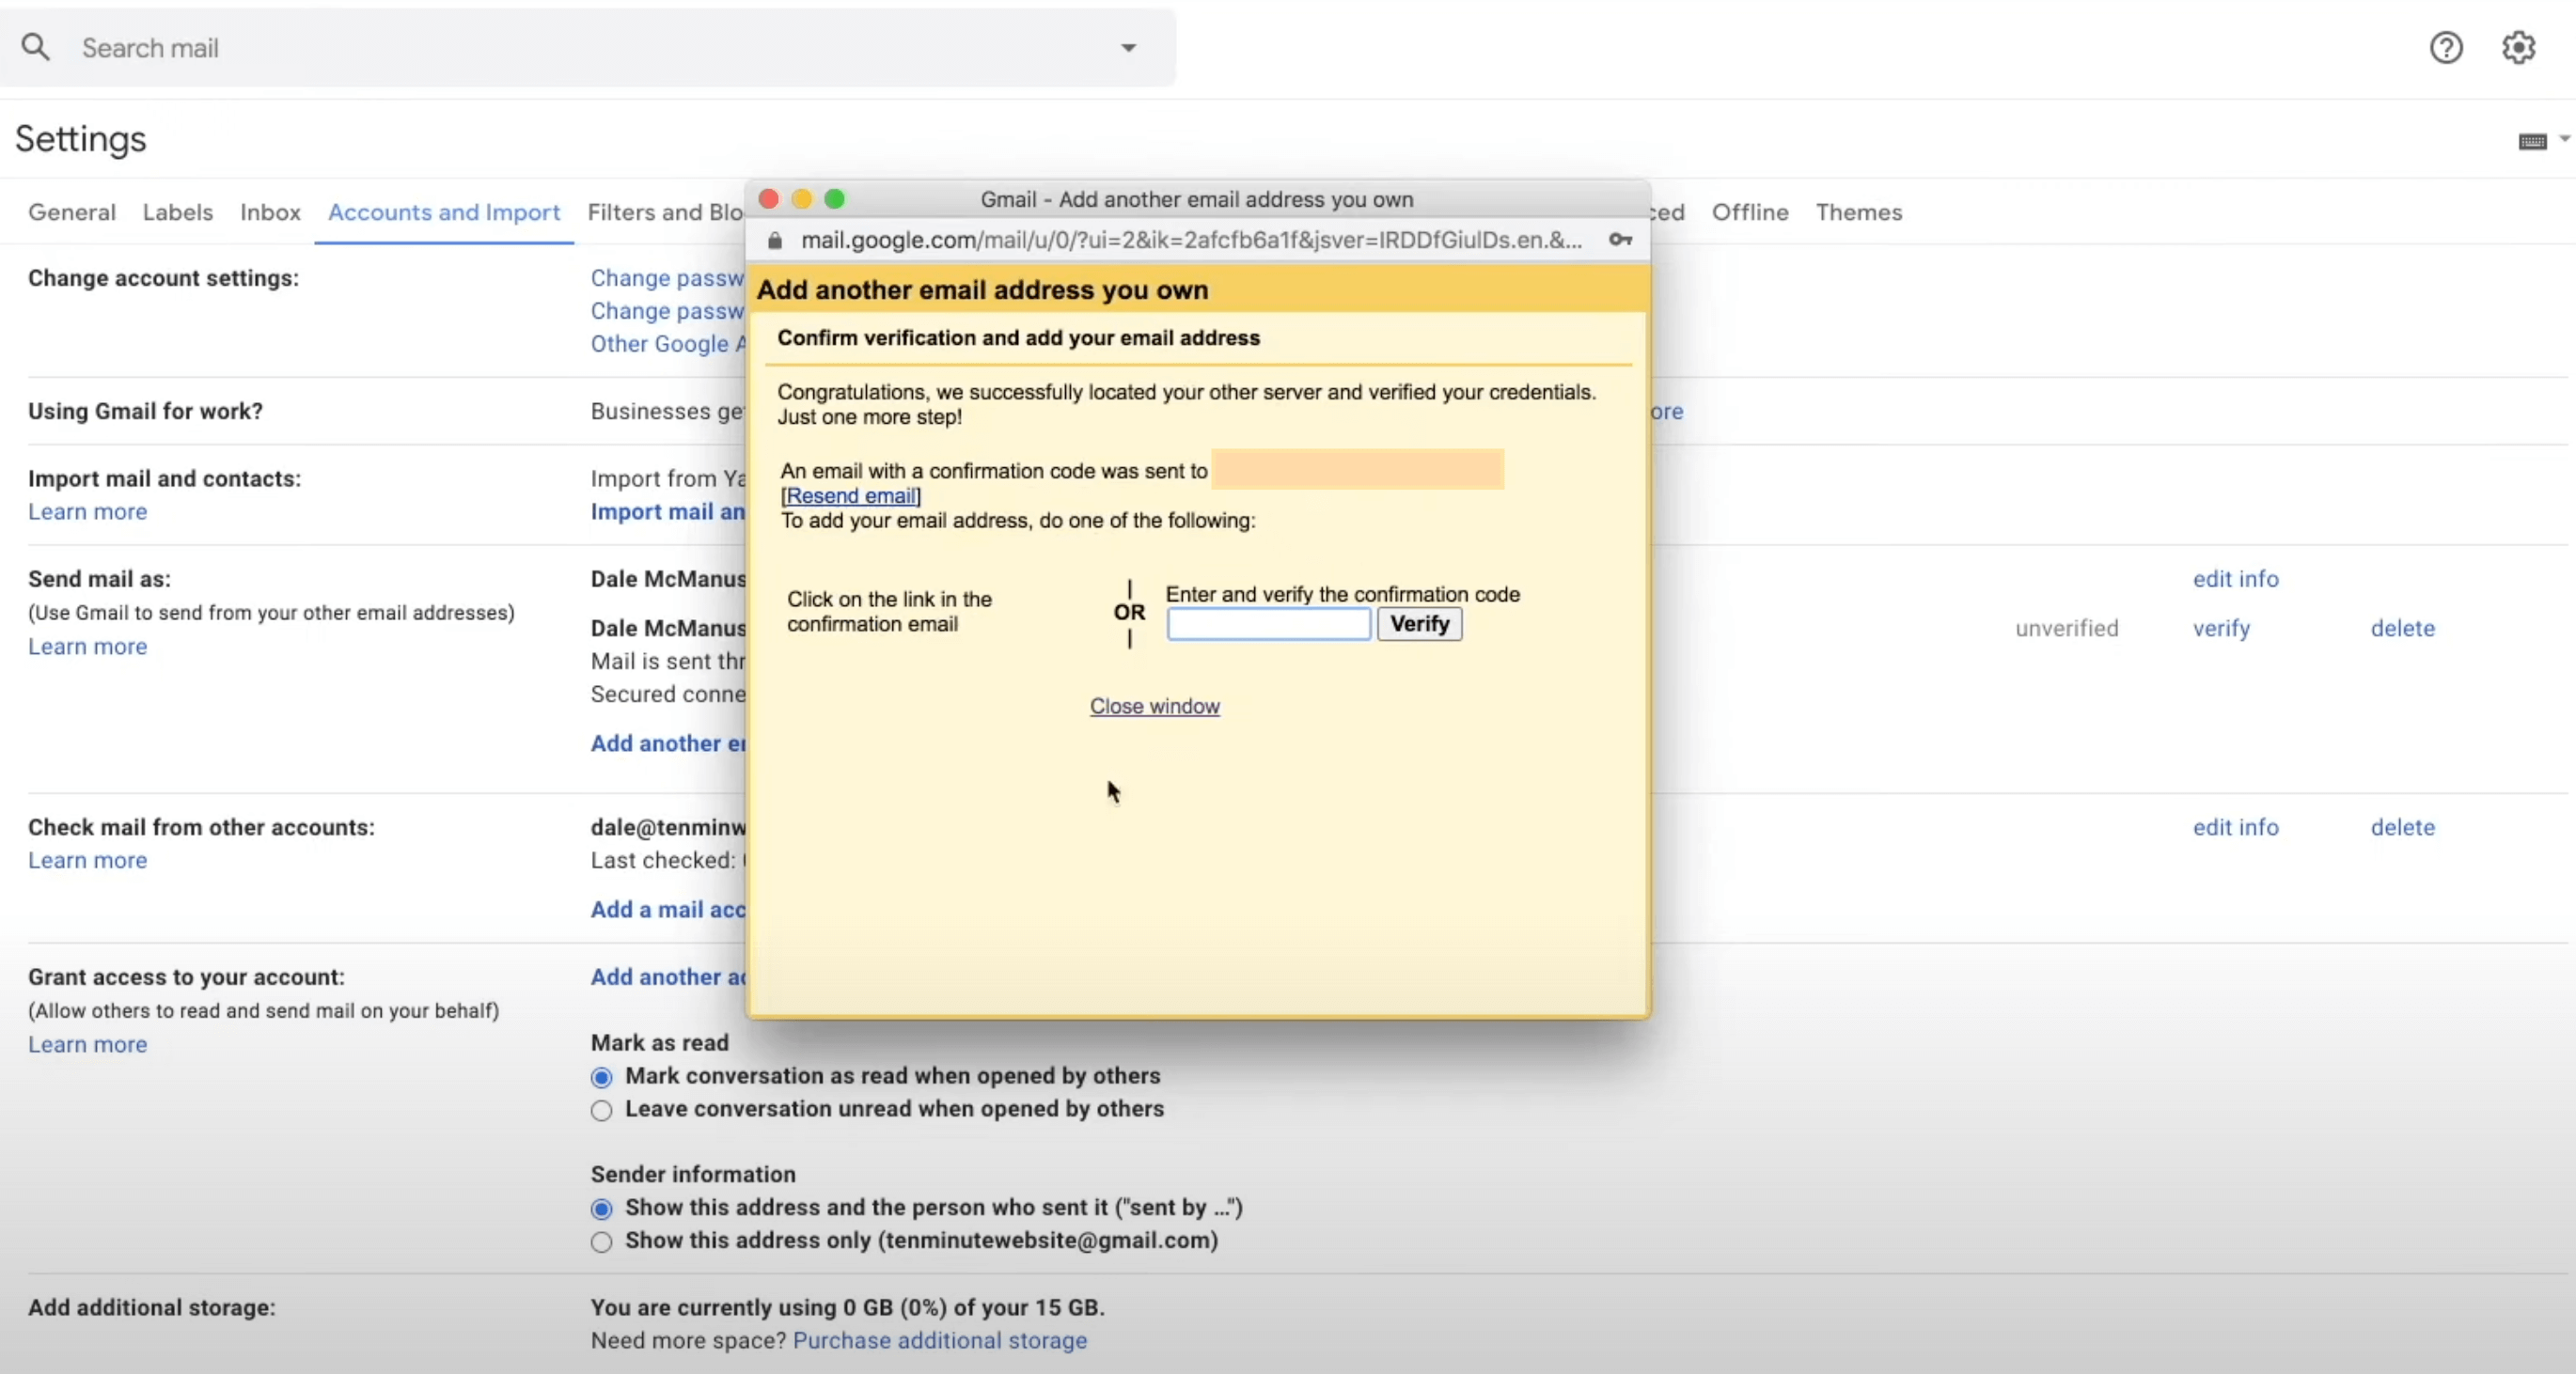
Verify your new email
In order to verify your new email, go back over to Gmail and then scroll down to "check mail from other accounts" and then click on check mail now.
It will say one mail fetched. The reason is that whenever you set up a new email with a Gmail account, Gmail knows that this account is not getting many emails right away because it's brand new. As a result, it will not fetch mail as often, but as you start to get more emails through this account, Gmail will fetch them almost instantly.
Once you've done, go back to our inbox, and you should see the confirmation email. This email includes a verification link and code. First, hit the link to confirm your email, then copy the code provided in the email. Then open the little yellow box and paste it into the box. Click on verify, and you are done.
Conclusion
The last step is to test your email address by sending a text email. When you compose and send an email to someone, your email should show your brand name as a sender and your custom email account as a default email address.
Incoming mails may go under the Spam folder; therefore, each time you check your email, make sure that you click on the Spam folder and mark those emails as "not spam" if they are necessary for you.
In this article, we have explained how to create a free business email for your business. Besides, several hosting plans offer free email accounts and clients. If you purchased one of them, then you don't need to create another email address.
That's all! We hope this guide helped you learn how to create a free business email address. For the following tutorials, stay tuned!


No comments yet