Understanding User Roles in WordPress: how to add and define new authors

If you have a WordPress blog website, you may want to collaborate with other people on your content. If so, you need to add new users and authors to your blog. These people can manage their content directly through the Admin Panel.
One of the great features of WordPress is the built-in user management system. This system allows you to add users with different permission levels and roles. In brief, if you don't want to give complete control to your authors, you can define further permissions for your collaborators.
In this article, we will explain how to add users and authors to your WordPress website, as well as an explanation of different user roles.
How to add a new user or author to your website
There are three most straightforward ways to add new users to your WordPress website.
1. You can add manually through WordPress build-in user management system;
2. You can create a registration form and let users create a free account;
3. You can create a paid membership website that users pay to register.
Manually adding new users to your website.
This option is the best and quick way to add new users or authors to your website because the WordPress built-in user management system is designed to add several types of user roles with different permissions.
This method is ideal for small business owners, organizations, blogs with multiple authors, and online stores managed by several people.
Go to the "Users" section and choose the "Add new" option on your WordPress Admin Panel to add new users. It will open a new window with several options. Here you just need to fill out the form to create a new user or author.
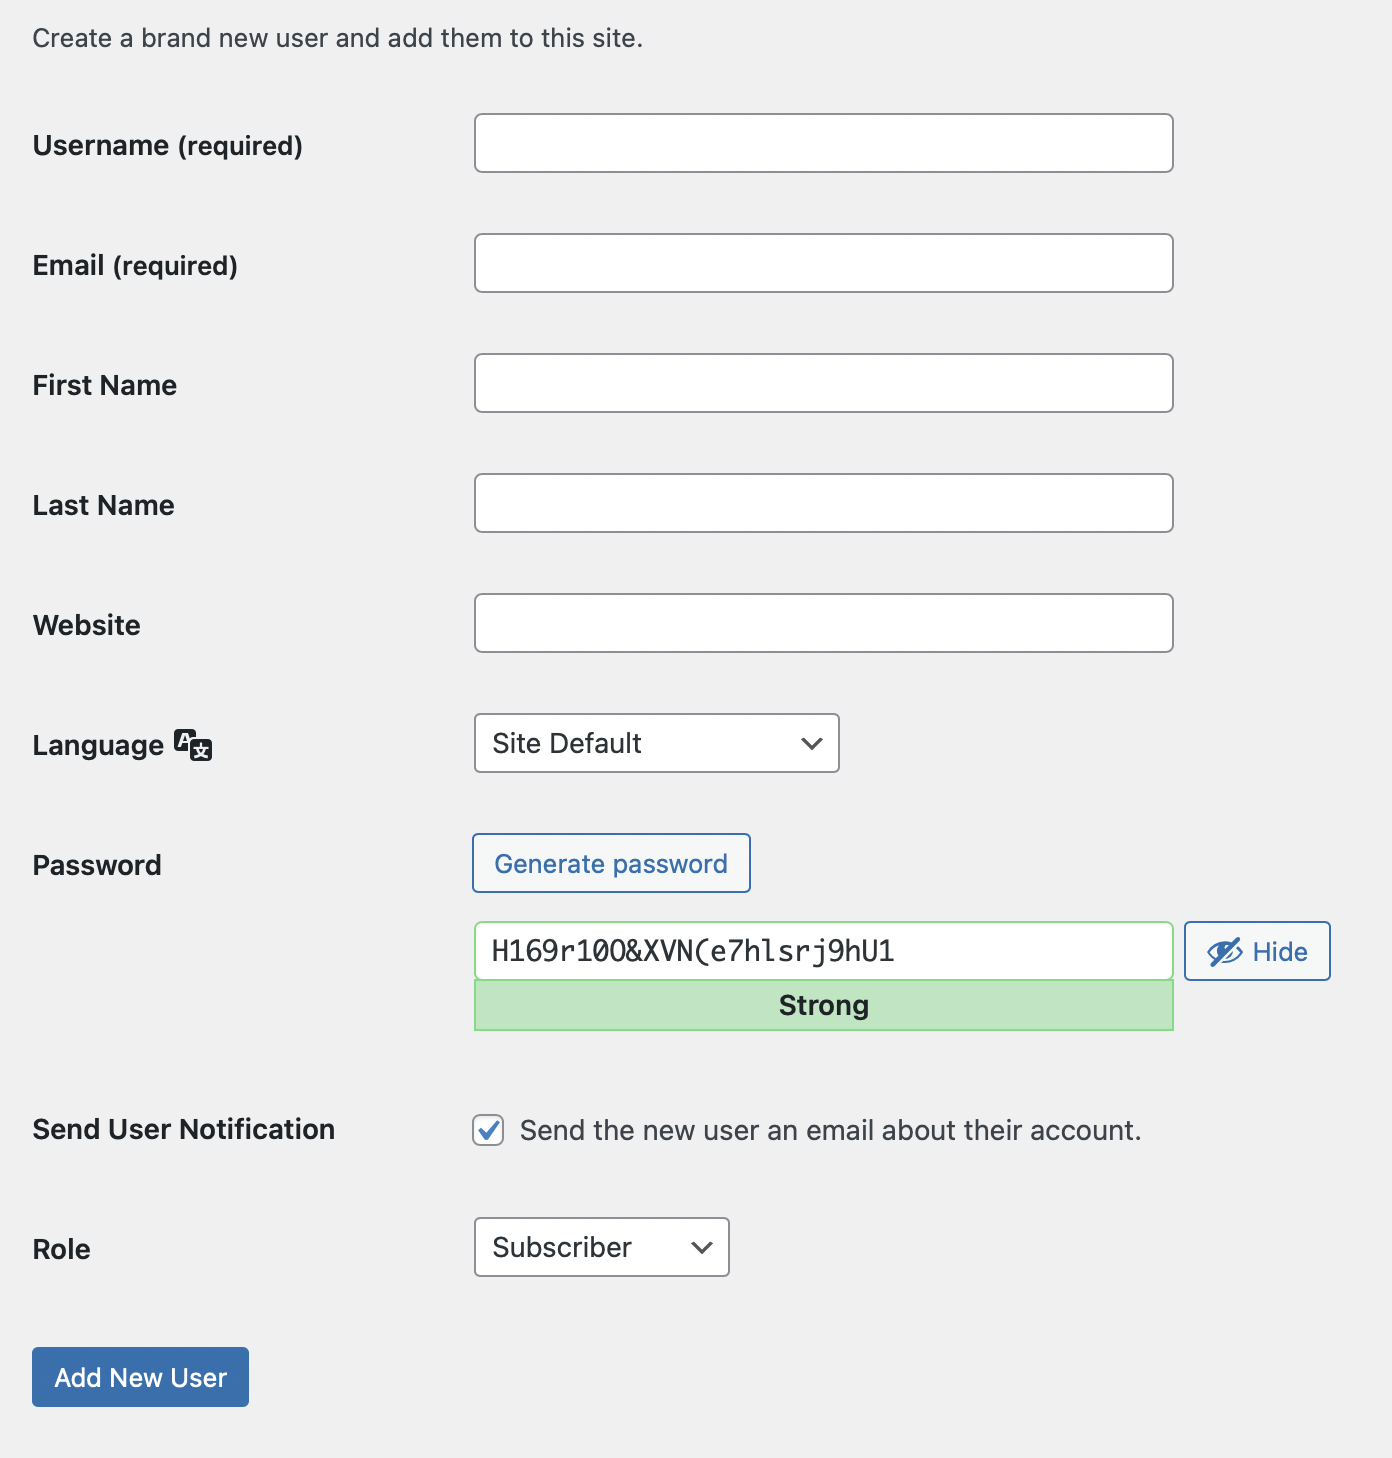
The essential element of this form is choosing a username. Your authors will use their username to log in to your website to manage the contents.
In addition, they can use their registered email address as well. But note that WordPress usernames cannot be easily changed later; therefore, pay extra attention when creating a username. However, all the other details can be modified easily in the future.
In the next section, enter the user's email address. When you add a new email address, double-check that you use the correct email address. This is important because all details regarding the registration will be sent to this email.
Moreover, if users want to change the password or any other information, they will need to use this email address to receive email notifications.
The next step is adding the first, last name, and website information if it is needed. Since these fields are optional, you can leave them blank. You can also add the social profile links to the website field. But if you don't fill this section, registered users can fill up these sections to complete their profiles later.
The following section is about choosing a password. We recommend you select strong passwords. You can use several online password generators or built-in password suggestions. Since the login URLs are predictable, make sure that your website is secured.
Below the password field, you will see a checkbox to send the users an email with their credentials. They will receive an email notification where they can see the username details and password reset link.
The last option is to choose a WordPress user role from the dropdown list.
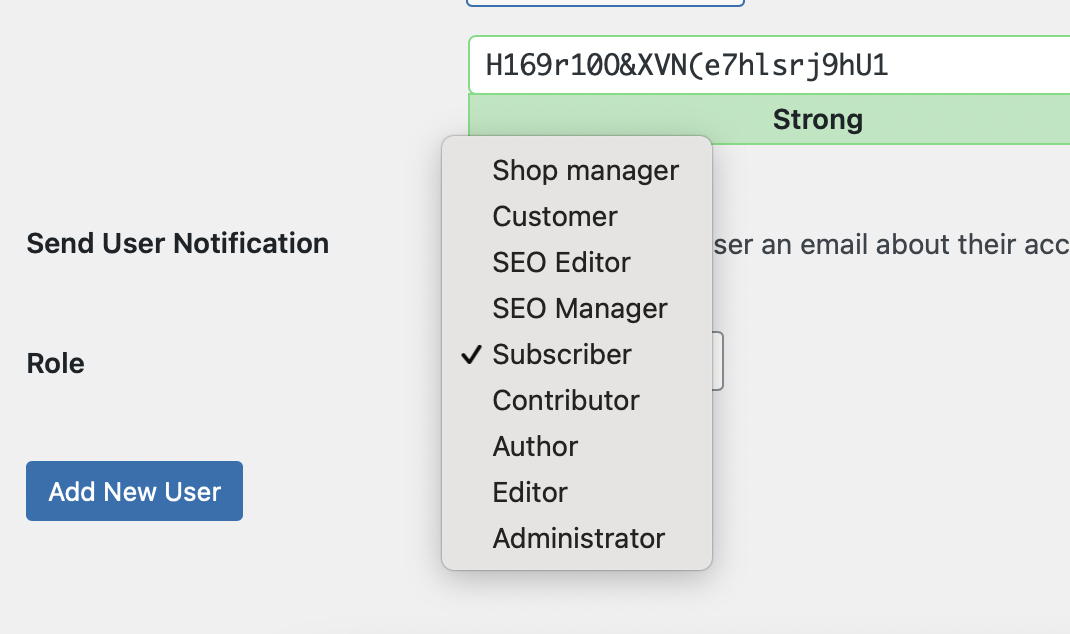
WordPress built-in user management system comes with different types of user roles and capabilities. When you click the dropdown list, you will see several options. "Administrator" is the most influential role in WordPress, and "Subscriber" is the least powerful option. Depending on your team's tasks, you can assign different roles.
If you are unsure about the role or want to change, don't worry, you can edit it later. Some plugins can create additional functions such as "SEO manager", "Customer", "Shop Manager", etc. Usually, these roles come from installed plugins or themes. To understand its capabilities, you need to check the documentation of the plugin or theme.
Understanding User Roles: how to choose the correct option?
By default, WordPress offers five different user roles:
- Administrator
- Editor
- Author
- Contributor
- Subscriber
Administrator
An administrator is the most powerful manager of the WordPress website. An administrator can perform all tasks, manage a complete website, add new users, install themes and plugins, delete content, change default settings, and many more.
Be careful when you assign this role to your collaborators. You should set this role who you fully trust and feel confident about their technical details.
Editor
An editor is the second powerful manager of the WordPress website. When you choose this role, you will notice that it has powerful options as well. An editor can add, edit, publish posts, delete their own posts. Moreover, they can delete other authors' posts, add new categories and pages.
However, they will not have access to edit or publish others' posts. Also, they cannot access the plugin and theme page. They can't change the settings of your WordPress website. You can assign a role who is responsible for and publishes content regularly.
Author
This role has more restrictions than "Editor". People, who have an "author" role, can add, edit, and publish content on your WordPress website. They can see others' posts but will not have an option to modify or delete their posts.
Also, they can't access features such as plugins, themes, settings, and tools. When they want to publish a post on your WordPress website, an administrator should approve it first.
Contributor
"Contributor" can add and edit their posts but cannot publish them without the administrator's approval. Its features and permissions are similar to the author; however, the contributor cannot upload image files to the website.
If you want your contributors to add media files that you can select later, you will need to create a file upload form. Several plugins offer such a service.
Subscriber
Subscriber is the least powerful role in WordPress. They don't have any permission to manage the website. Website owners use this role to see their audience to add comments or manage their profile.
Managing Users in WordPress
As mentioned above, only the administrator has access to the whole website settings. It means that only the administrator can define user roles and change them later. As an administrator, you can add or remove users from your WordPress website at any time by heading to the "Users" section.
In this section, you can also edit user details and credentials, manage their password, change their role, and many more. You can edit your own profile by uploading a new profile picture, changing passwords, adding new website links, and so on.
If you want to let your users register on your website, you need to change website settings to allow others to register for free.
Simply go to the "Settings" and then "General" in your WordPress Admin Panel and check the box called "Anyone can register." By default, all registered users will be given the "Subscriber" role. If you want to change their position, you need to do it through the "Users" section.
Conclusion
We hope this article helped you learn and understand the user roles on your WordPress website. Before adding a user, make sure that you enter the correct details of your authors.
Also, do not give higher roles to the people that you don't know well. Editor and Contributors can publish posts easily without approval, but the lower roles need admin approval.
Therefore, we recommend you never use "Administrator" as the default settings.
If you want to see more content like this, stay tuned!

No comments yet